
 Pipeline Setup (Stages & Statuses) - Phase 2: Customizing Statuses
Estimated Time
~15 minutes
Current Phase
Phase 2 of 2
What You'll Accomplish
- Create content files using Structured AI tools.
- Organize and prepare files for publishing.
- Navigate the publishing workflow within the platform.
- Publish content files efficiently and accurately.
|
Before you begin — open your account This is a hands-on, learning-by-doing session. Open app.structured.ai in your browser and log in to your Tenant Account so you can follow along and apply each step in real time. |
Direct Links to the Next Phases in this Training Series
This module is part of a 2-part series. Each session builds on the
last, and reviewing them in order ensures you don't miss any critical
steps and get a complete understanding of the workflow.
|
Phase 1
Purpose & Framework
|
Start Training ➡ |
|
Phase 2
Customizing Statuses
|
Current Phase ✔ |
Follow Our Step-By-Step Training
1. Introduction
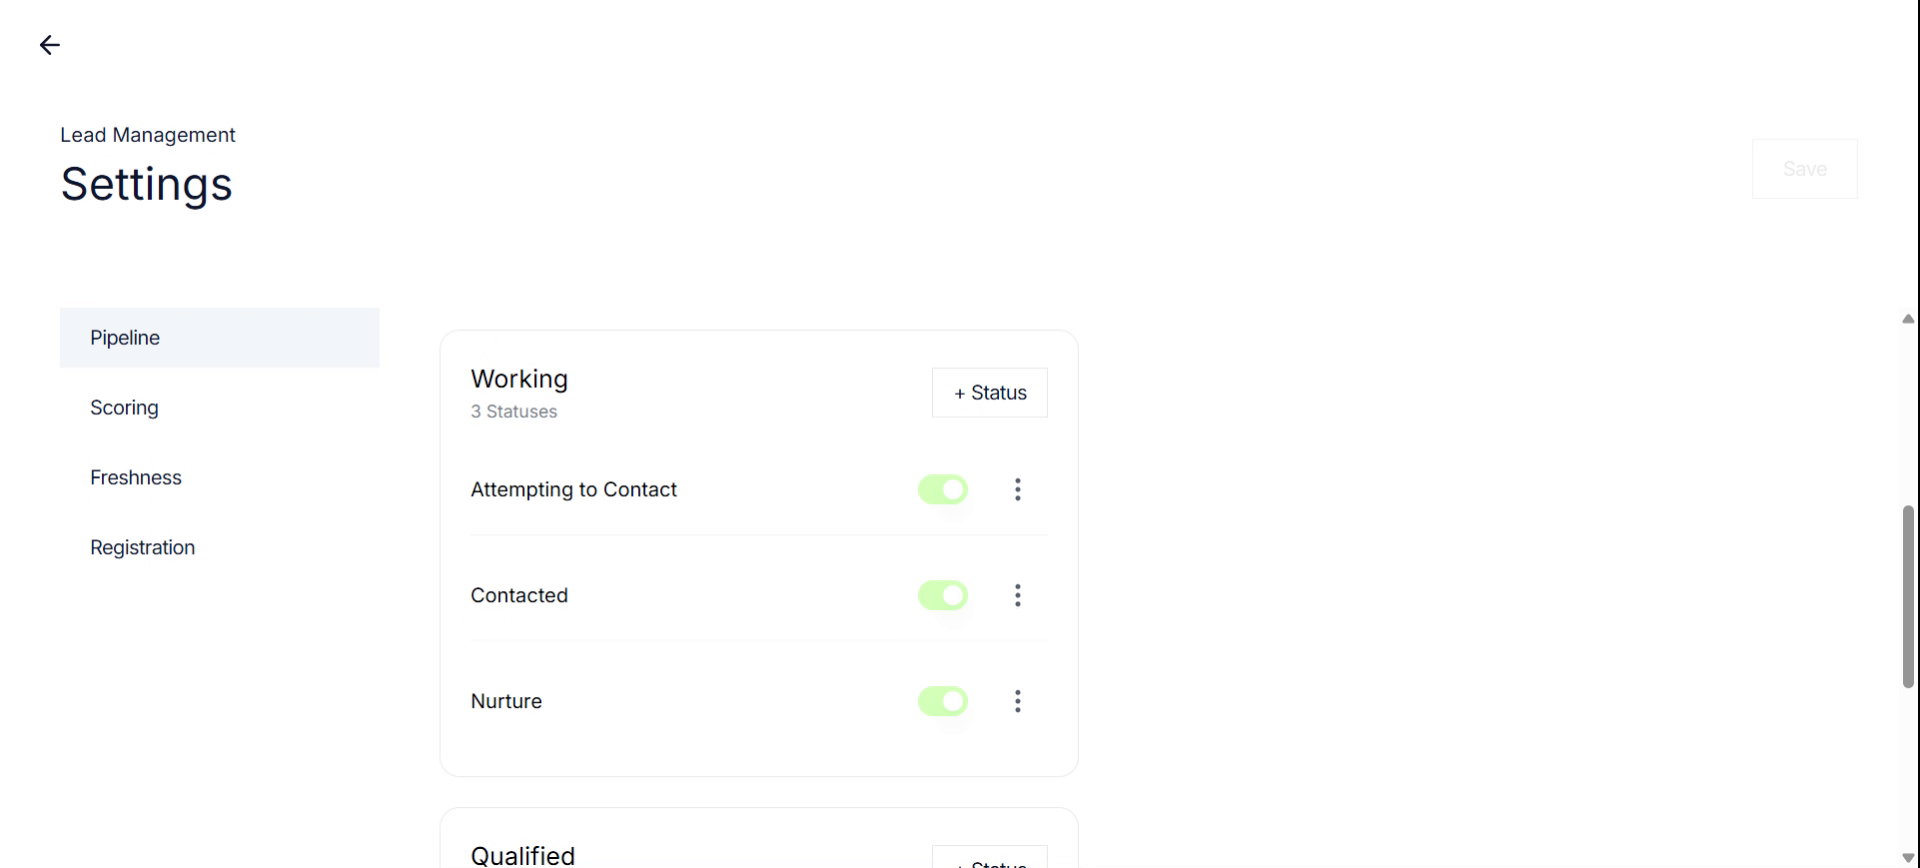
Beneath each pre-defined stage, you have full flexibility to define Statuses, which are the specific workflow steps unique to your sales methodology.
2. Access Pipeline Section
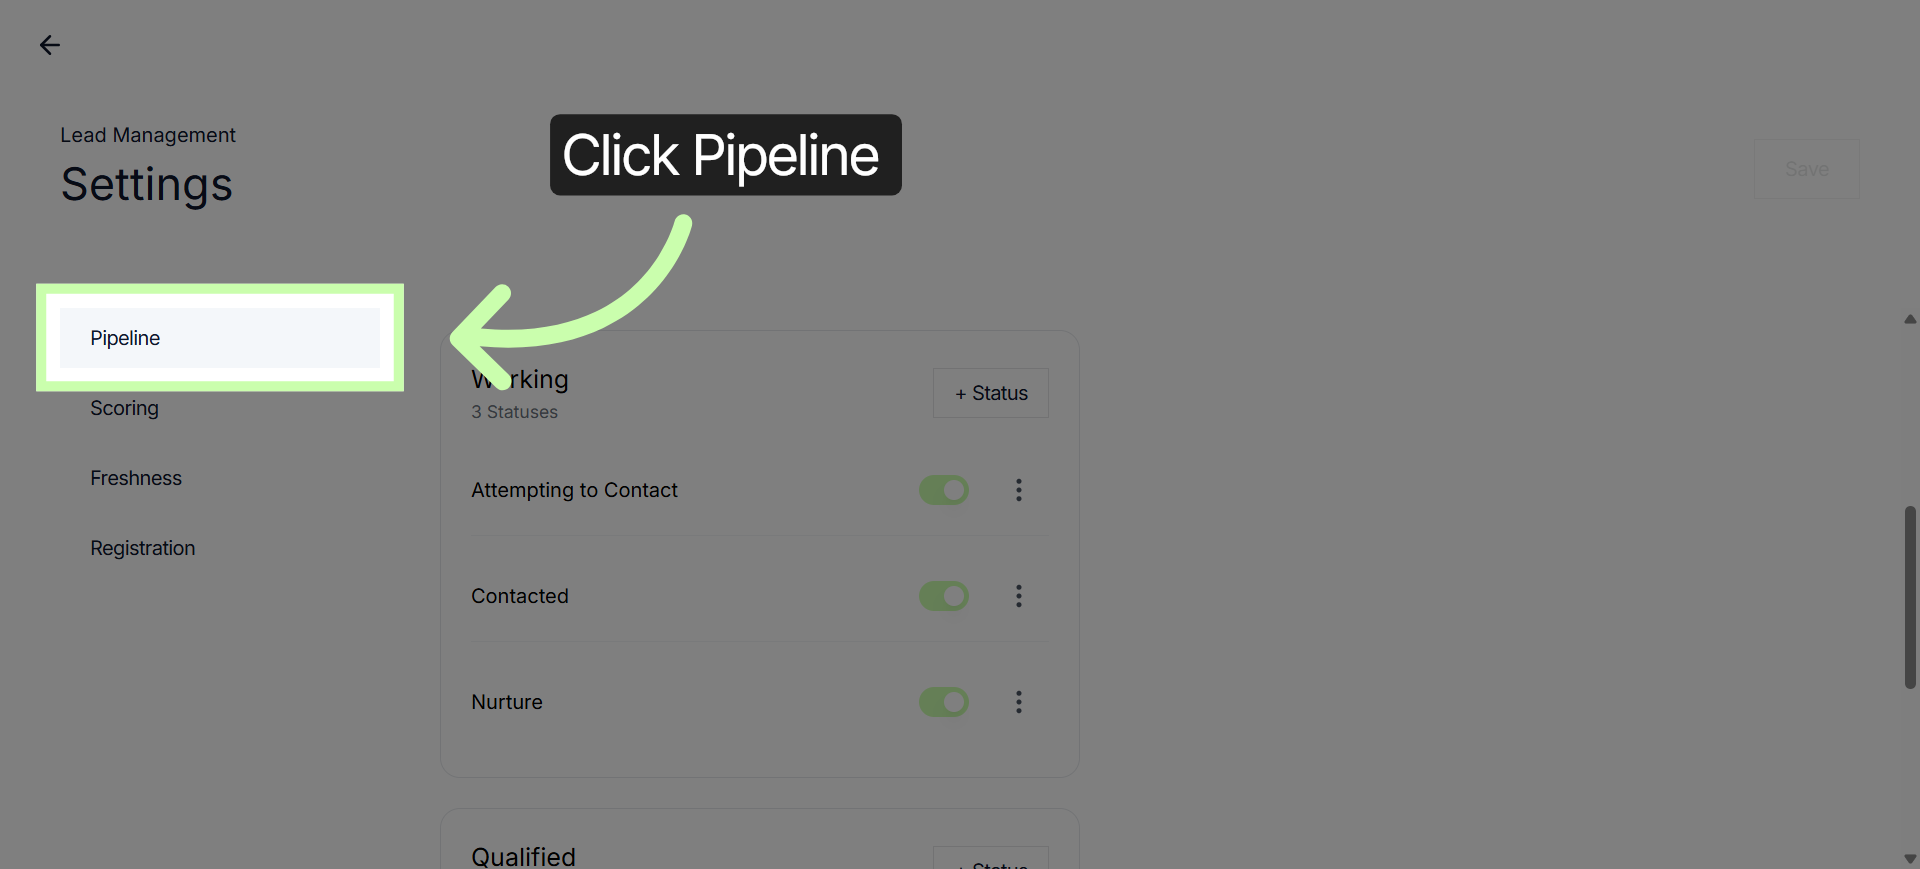
To begin, you first need to access the Pipeline.
3. Open More Options
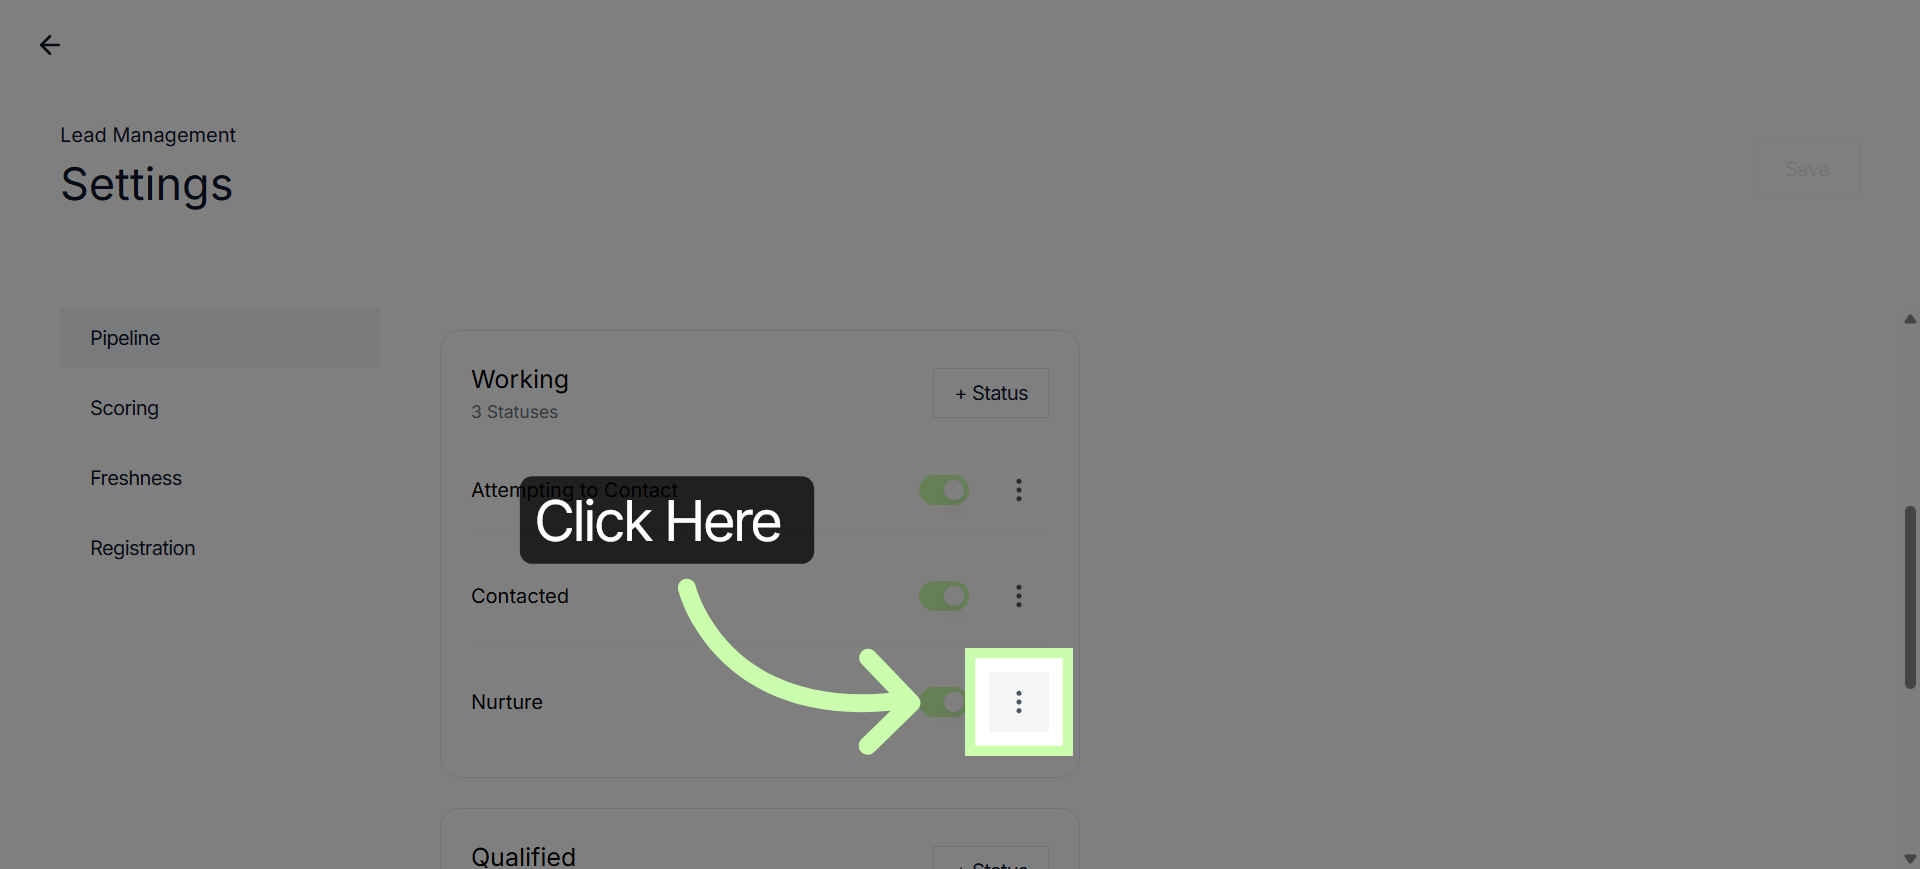
To rename default statuses, click the three dots. This will open the More Options settings for the status.
4. Edit Status Name
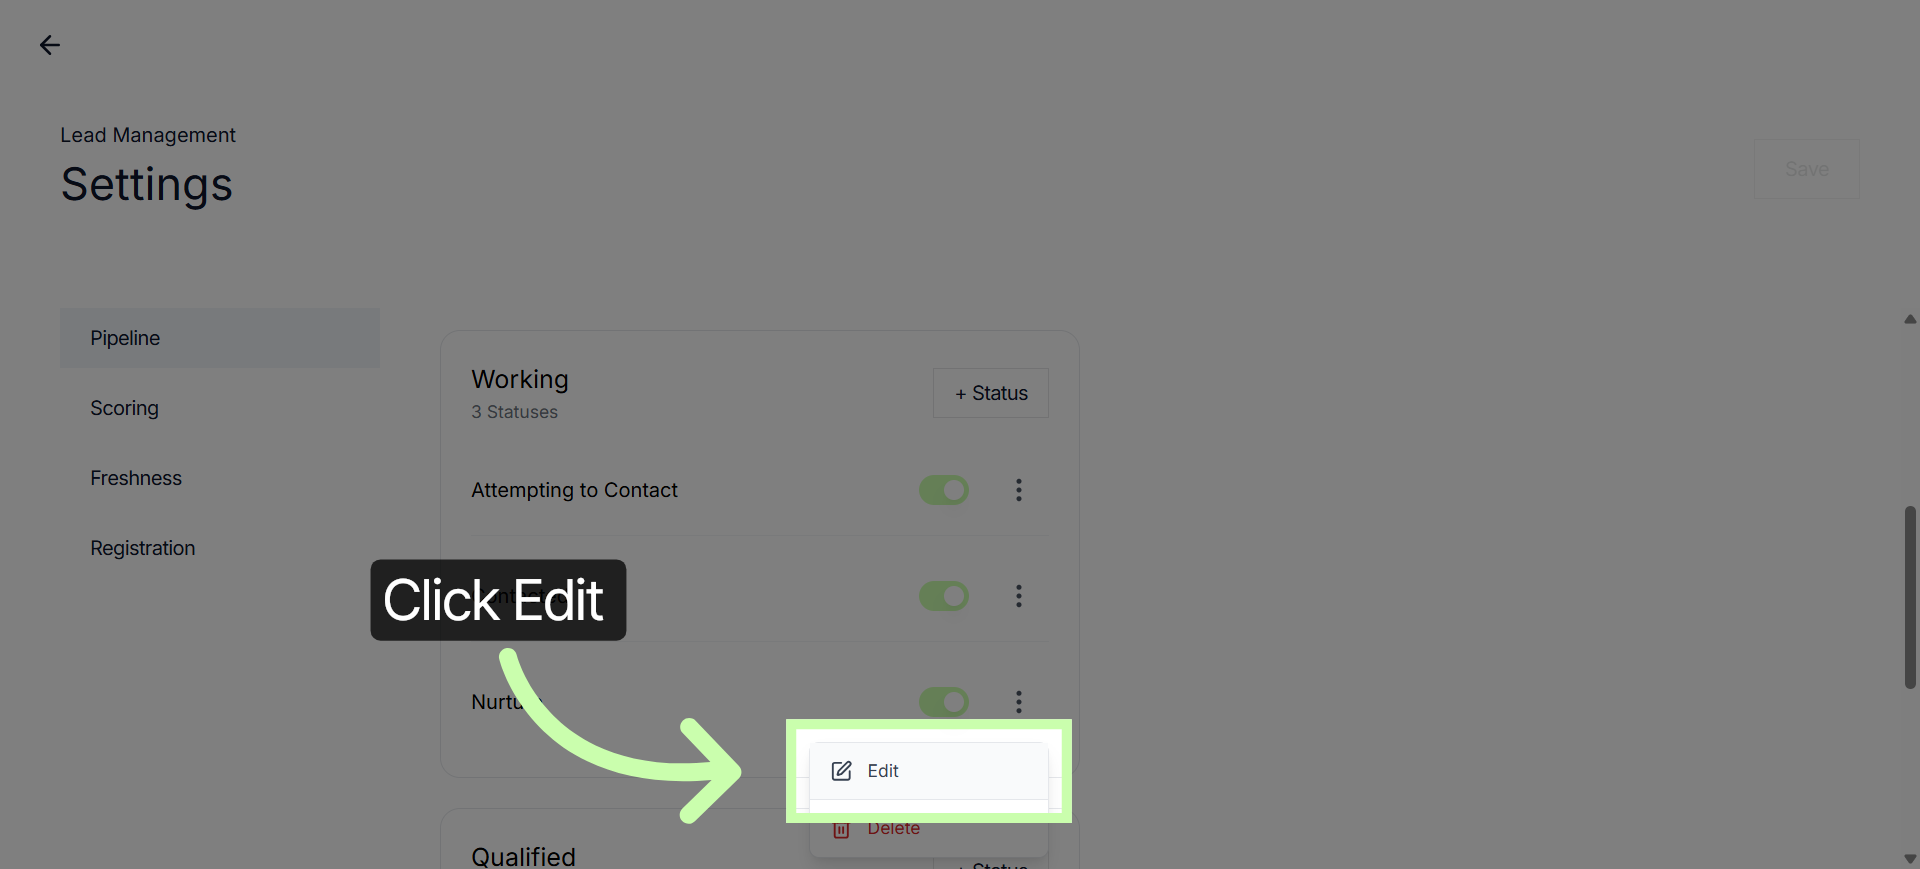
Once you are in the More Options settings, click Edit to change the current status name.
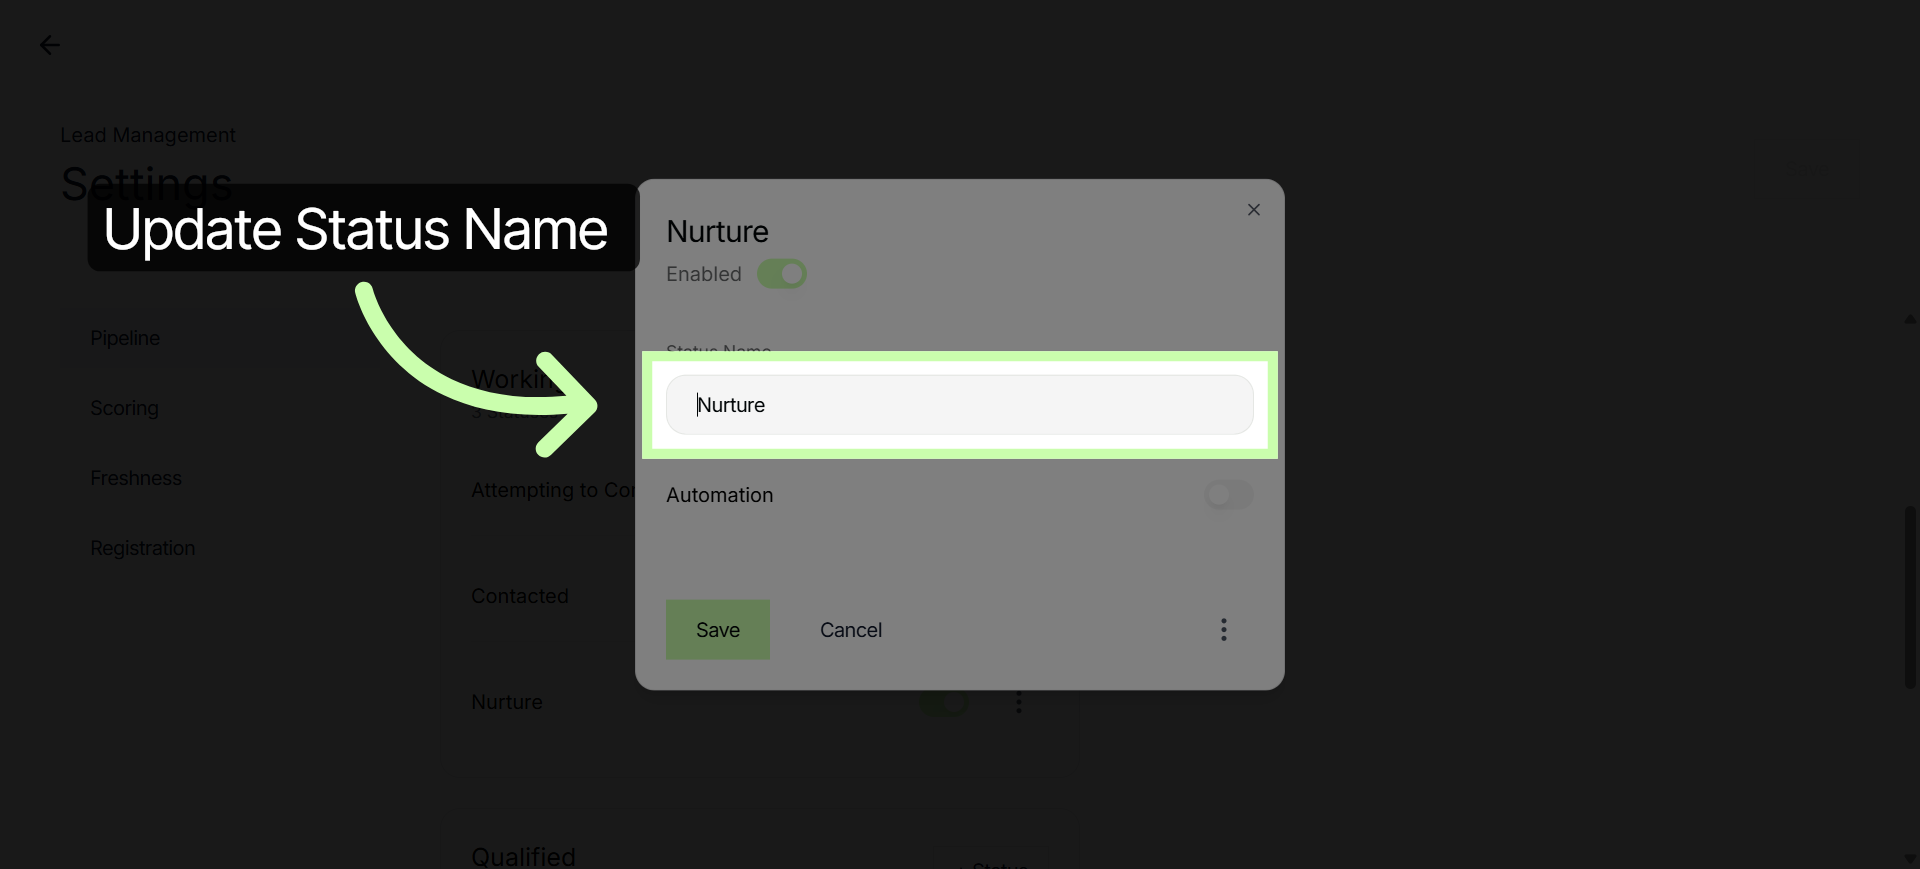
5. Enter a New Status Name
Enter your new status name in the text box.
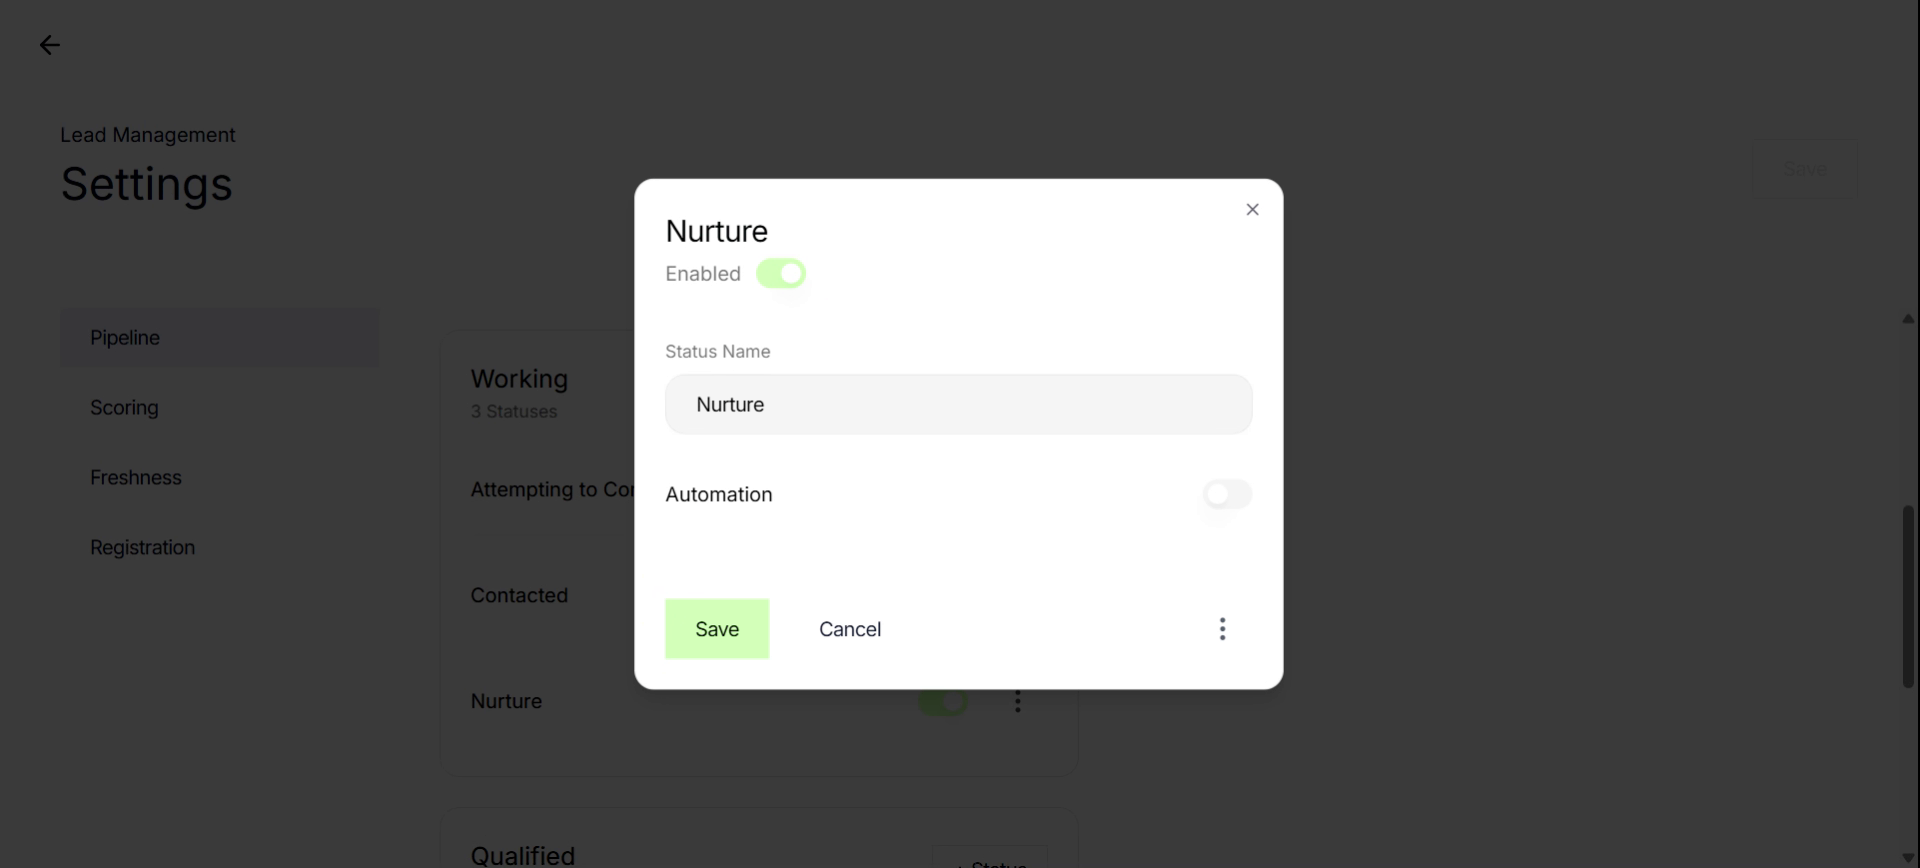
6. Rename Status to Long-Term Nurture
In this example, we'll change the Nurture status to "Long-term nurture".
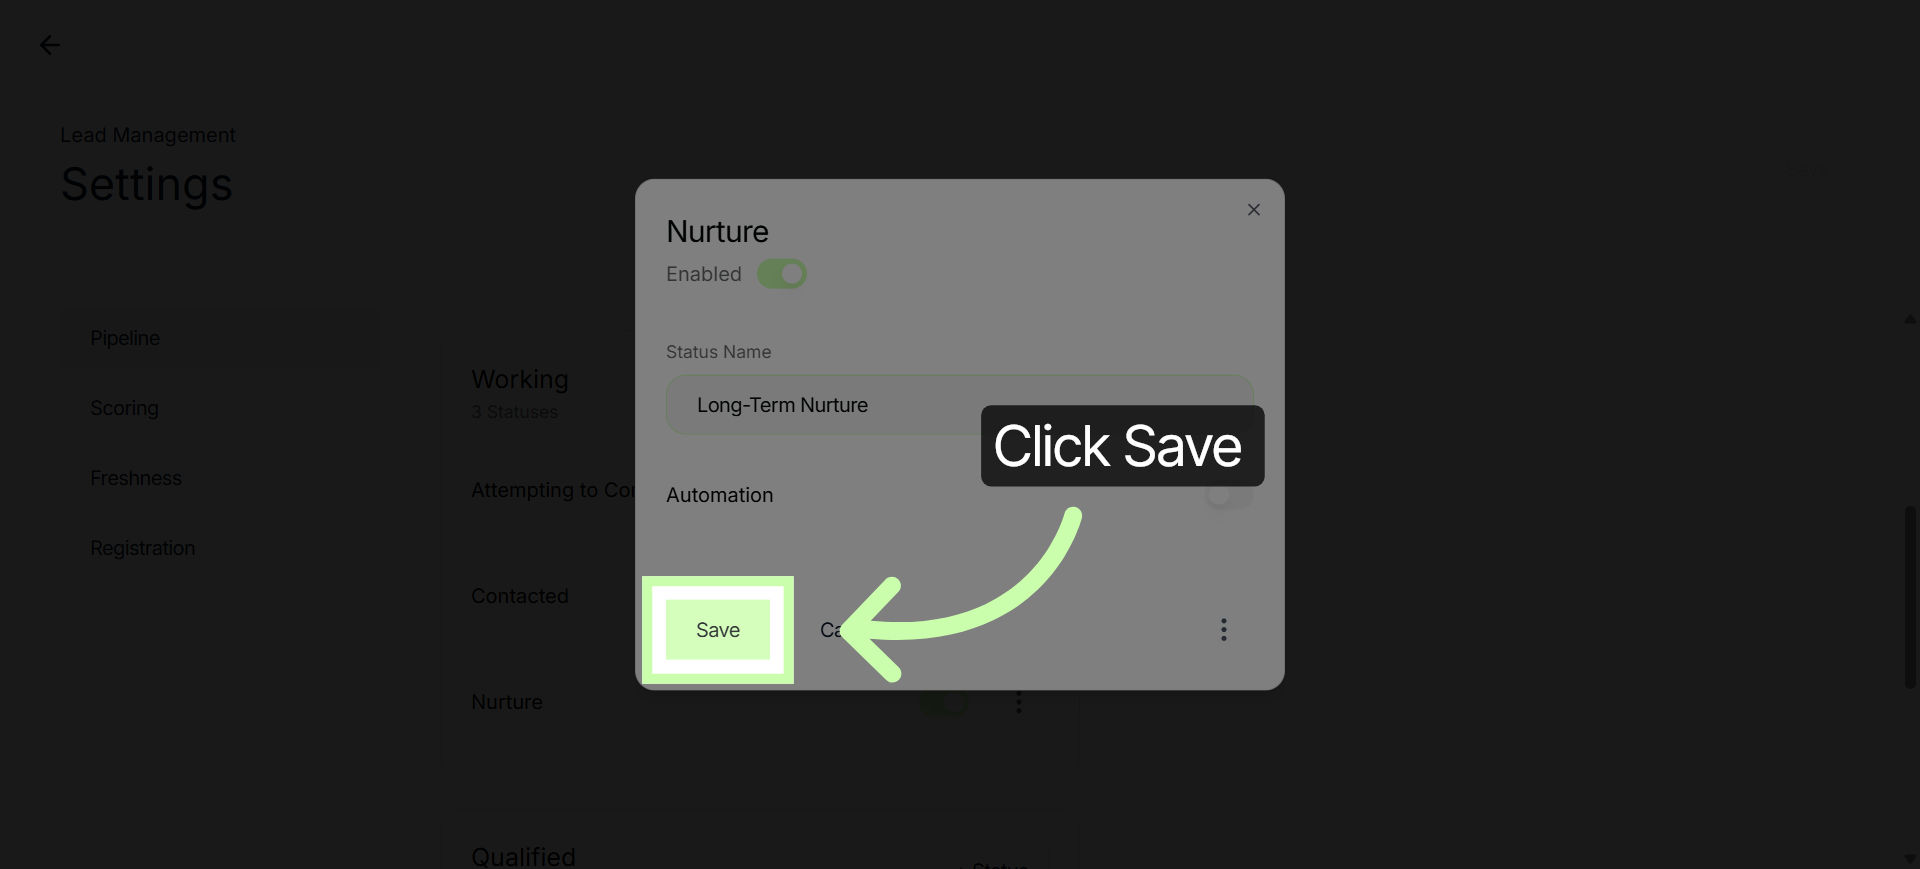
7. Save Status Changes
Click the Save button to apply the change made to the status name.
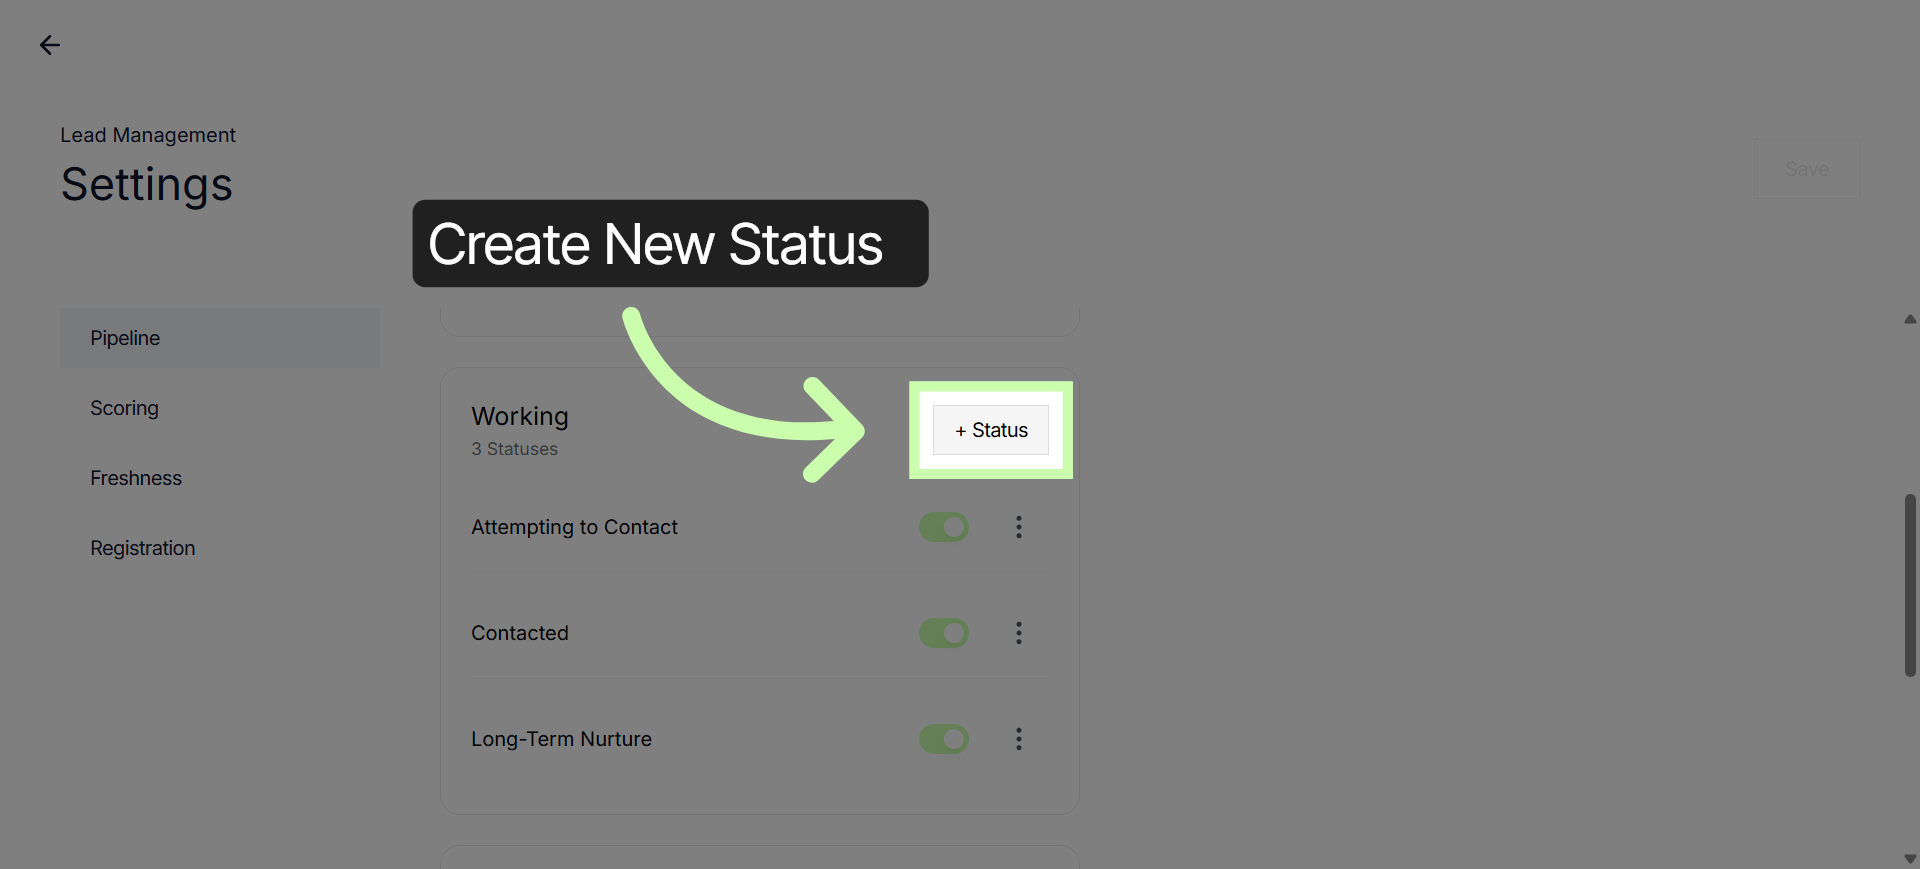
8. Add New Status
Along with updating an existing status name, you can also add a new status. You can click + Status to create a new status, like demo requested.
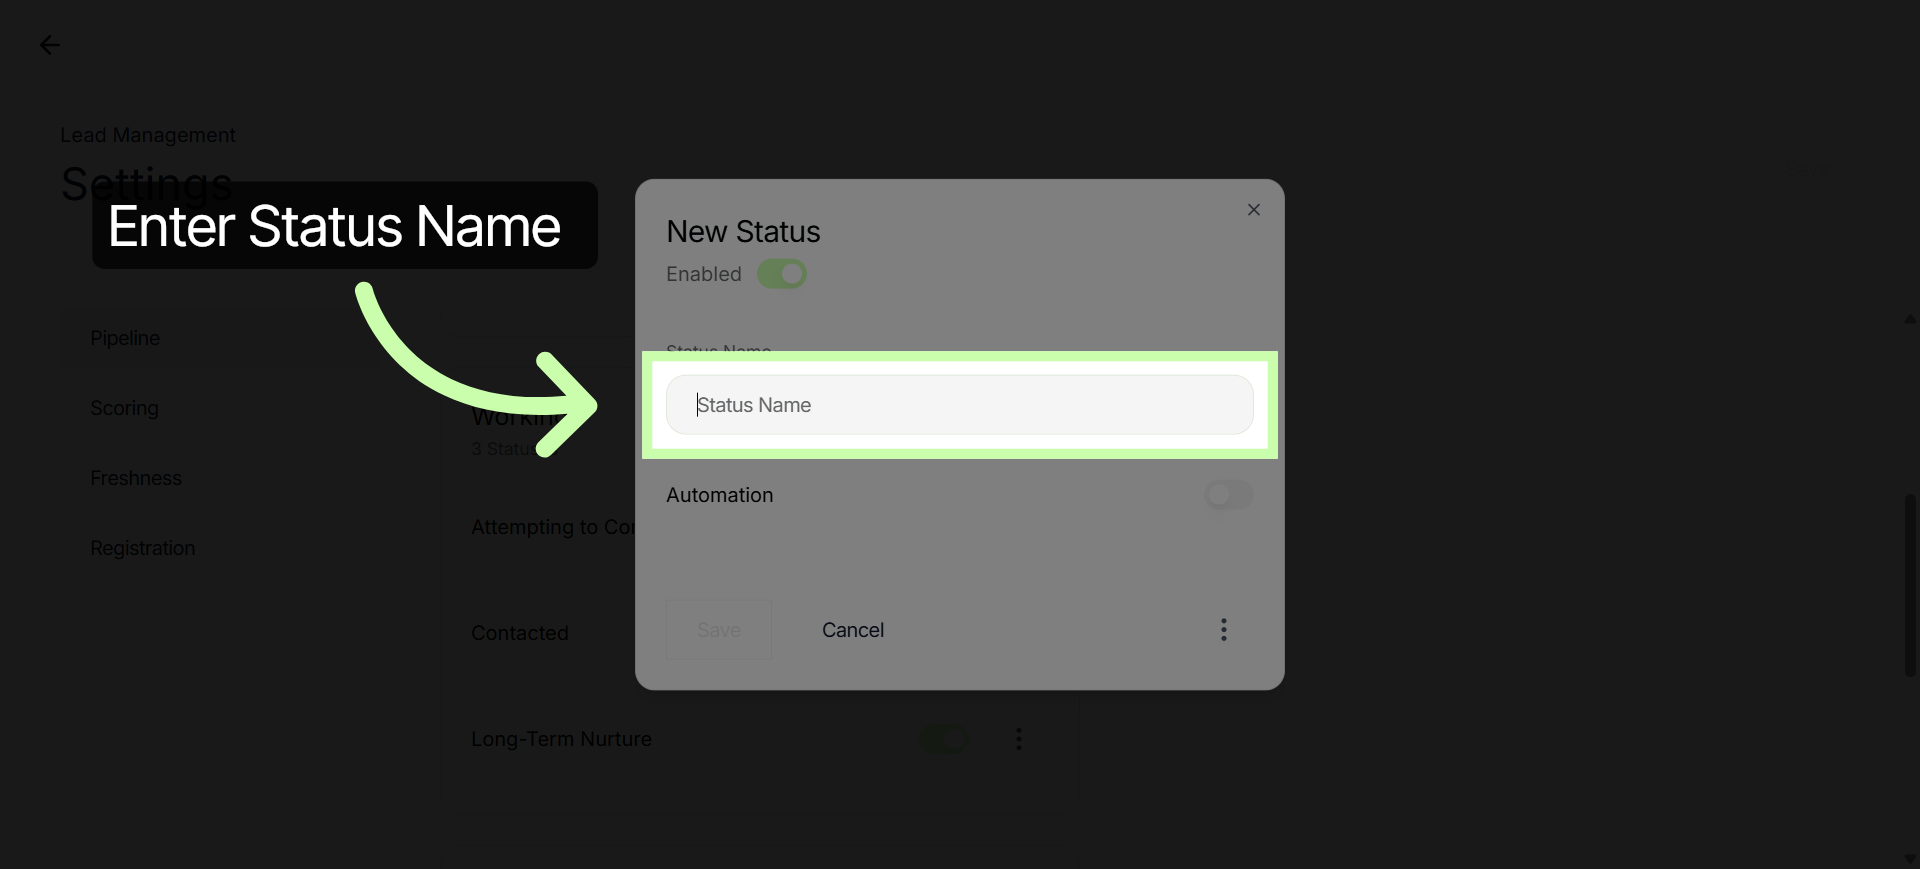
9. Enter New Status Name
Enter the new status name in this text box.
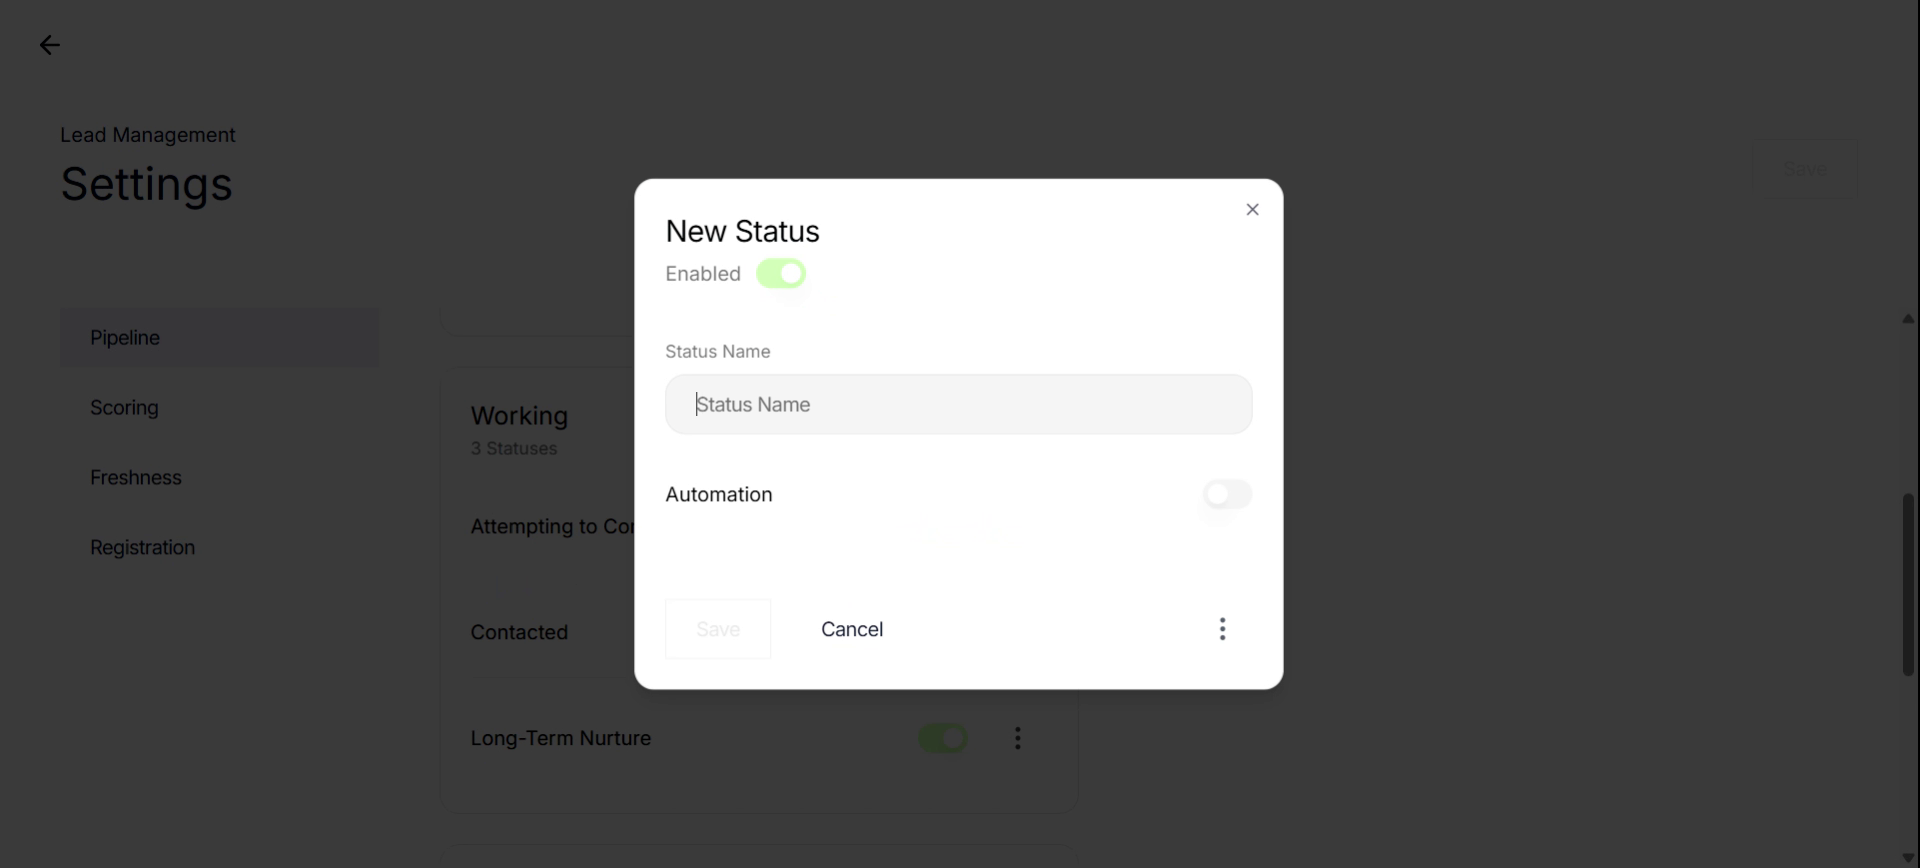
10. Name New Status "Demo Requested"
In this example, we'll enter "Demo Requested".
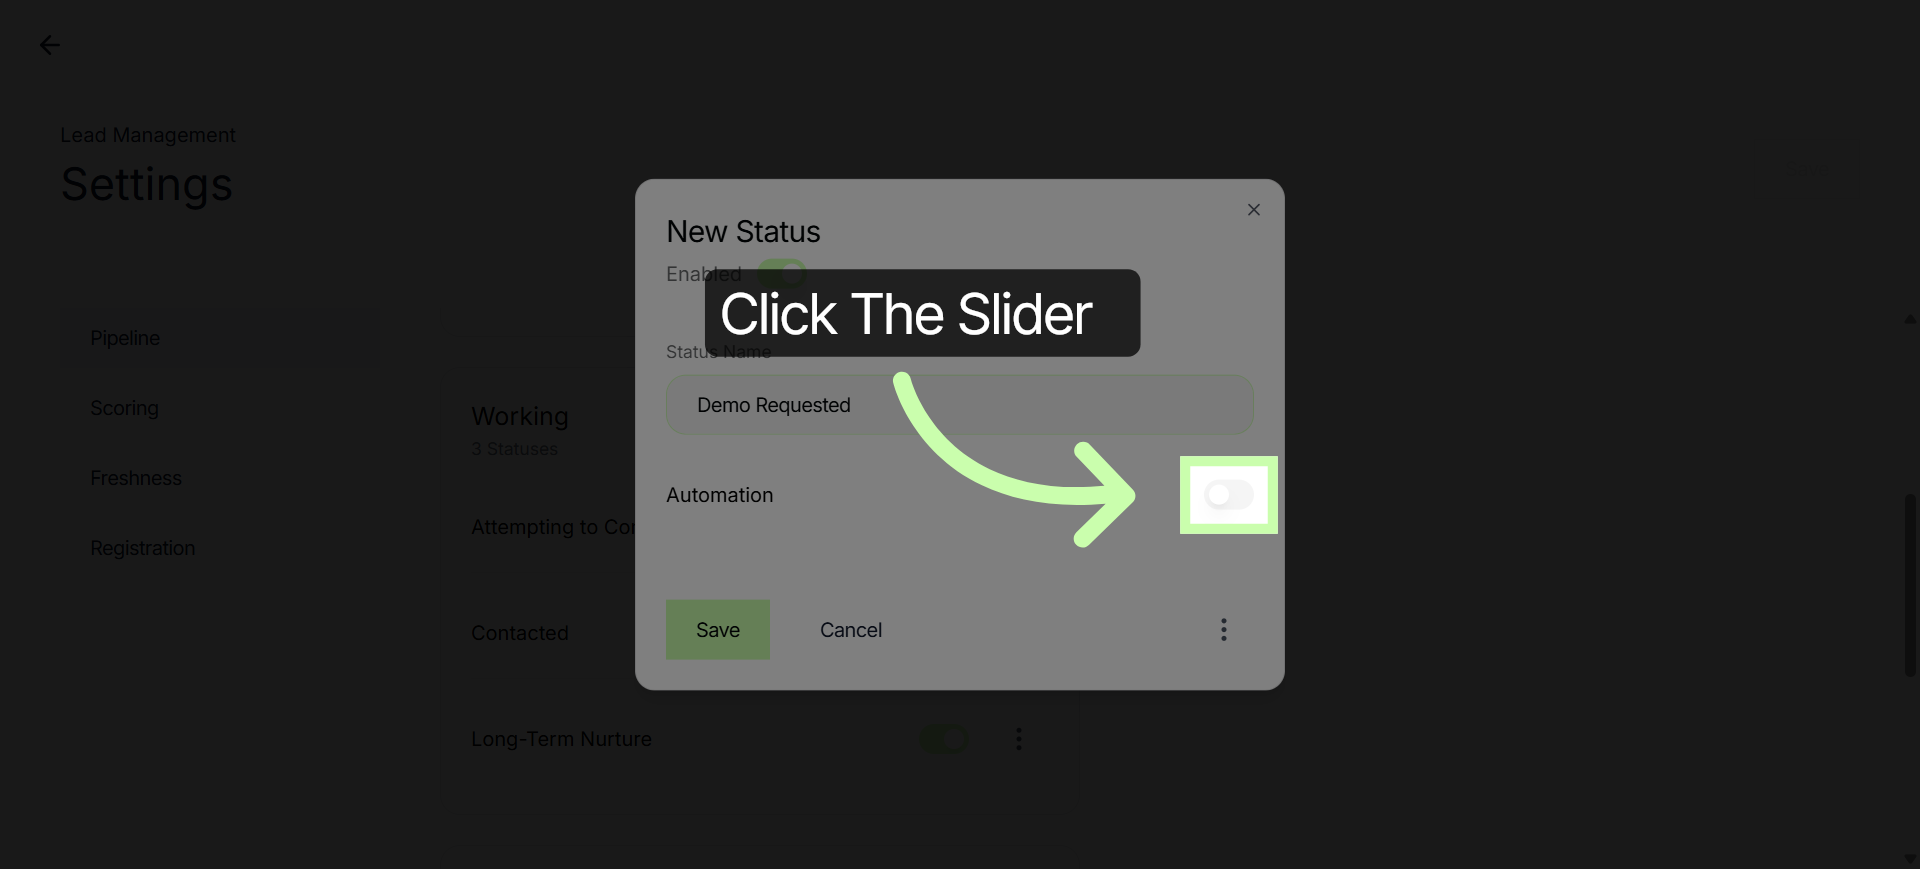
11. Setup Automation
In addition, you can set up automation that automatically moves leads through each status.
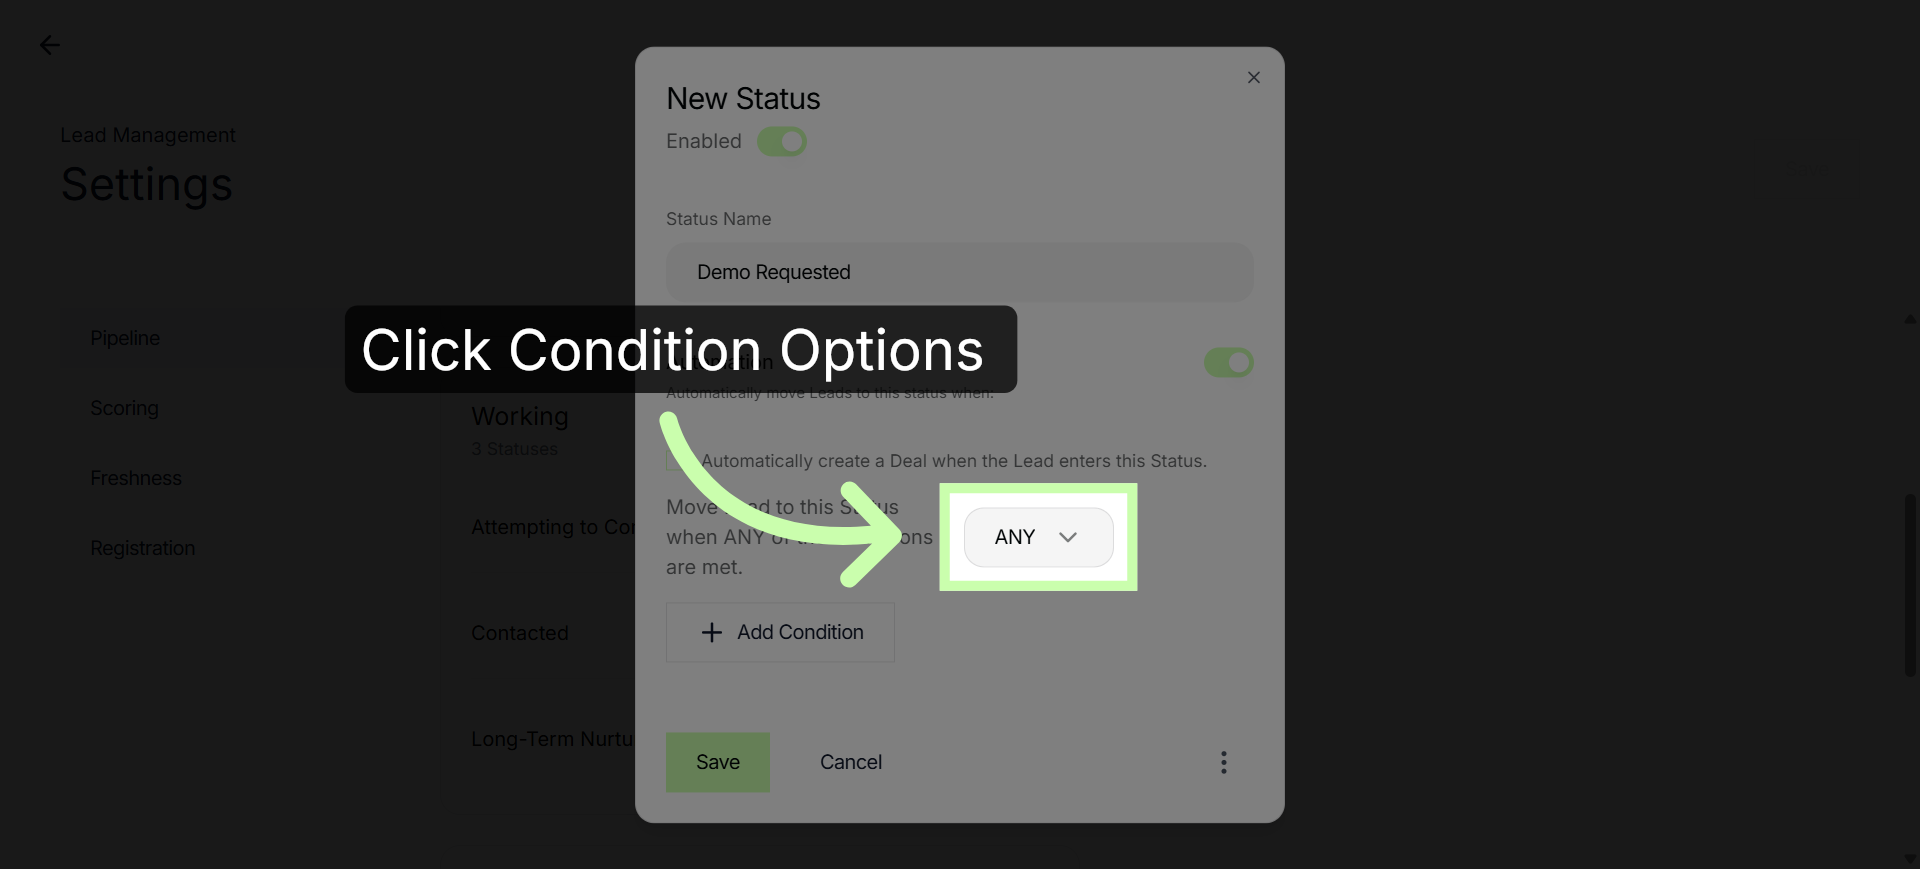
12. Open Condition Options
Click Condition options to configure the criteria for moving leads to this status.
13. Select Condition Logic
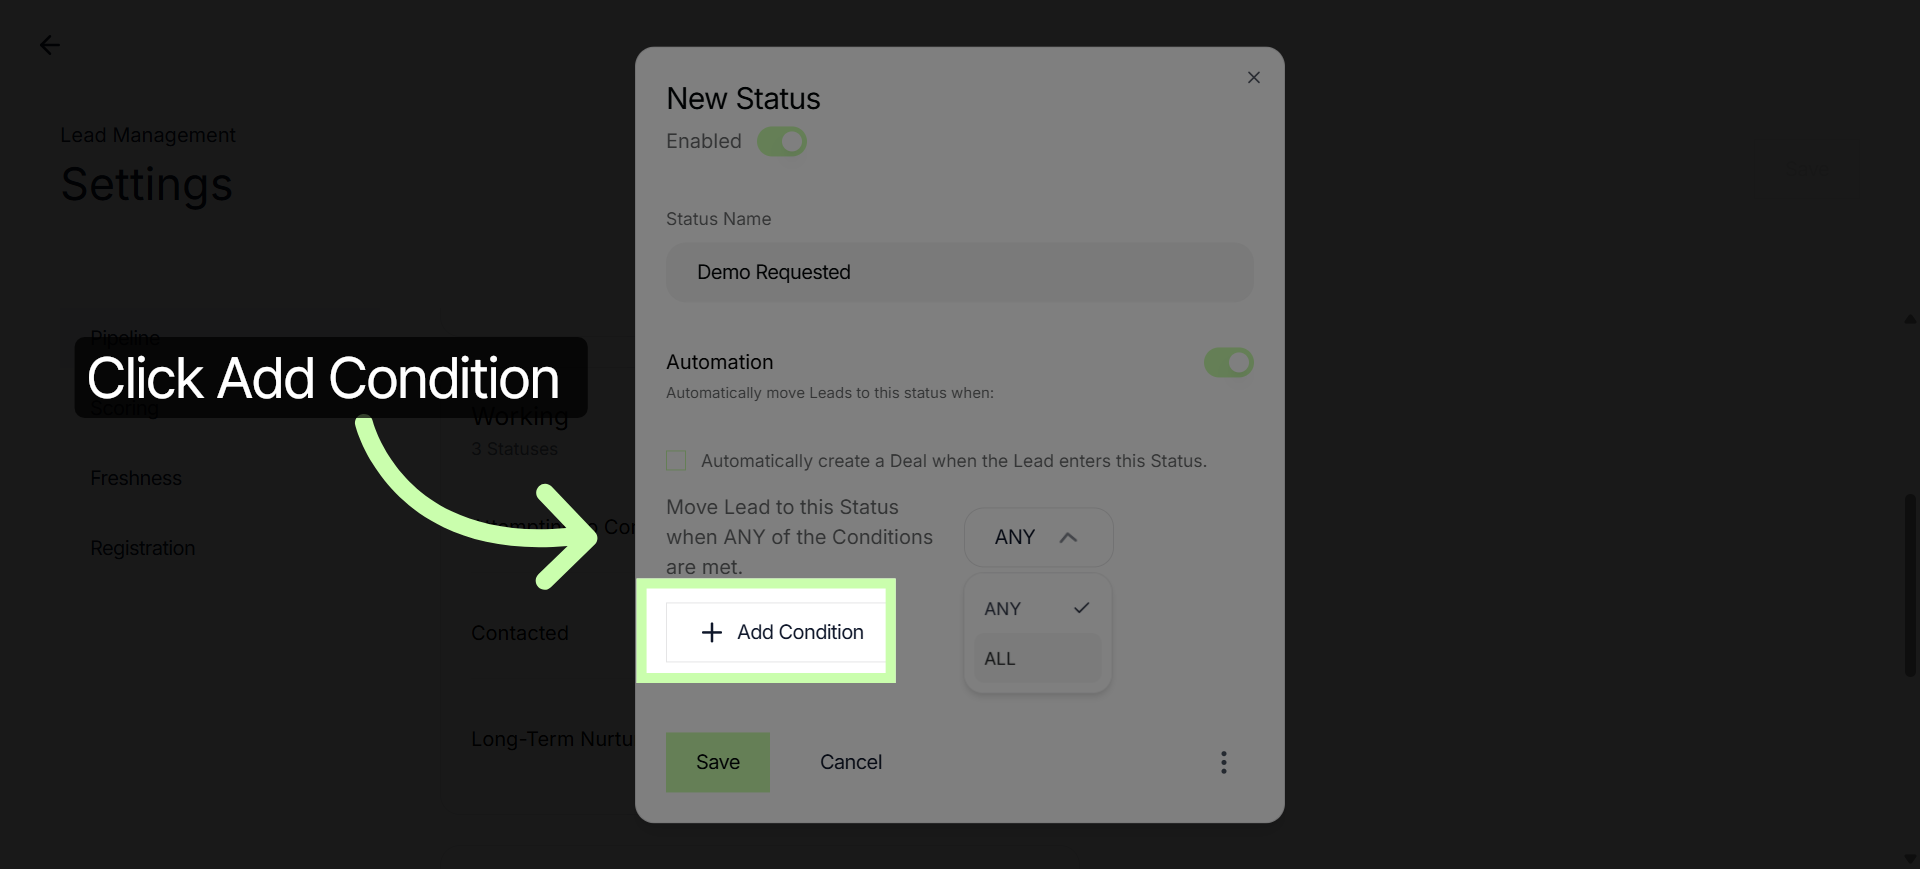
Click the + Add Condition option to choose your automation condition.
14. Choose Lead Score Condition
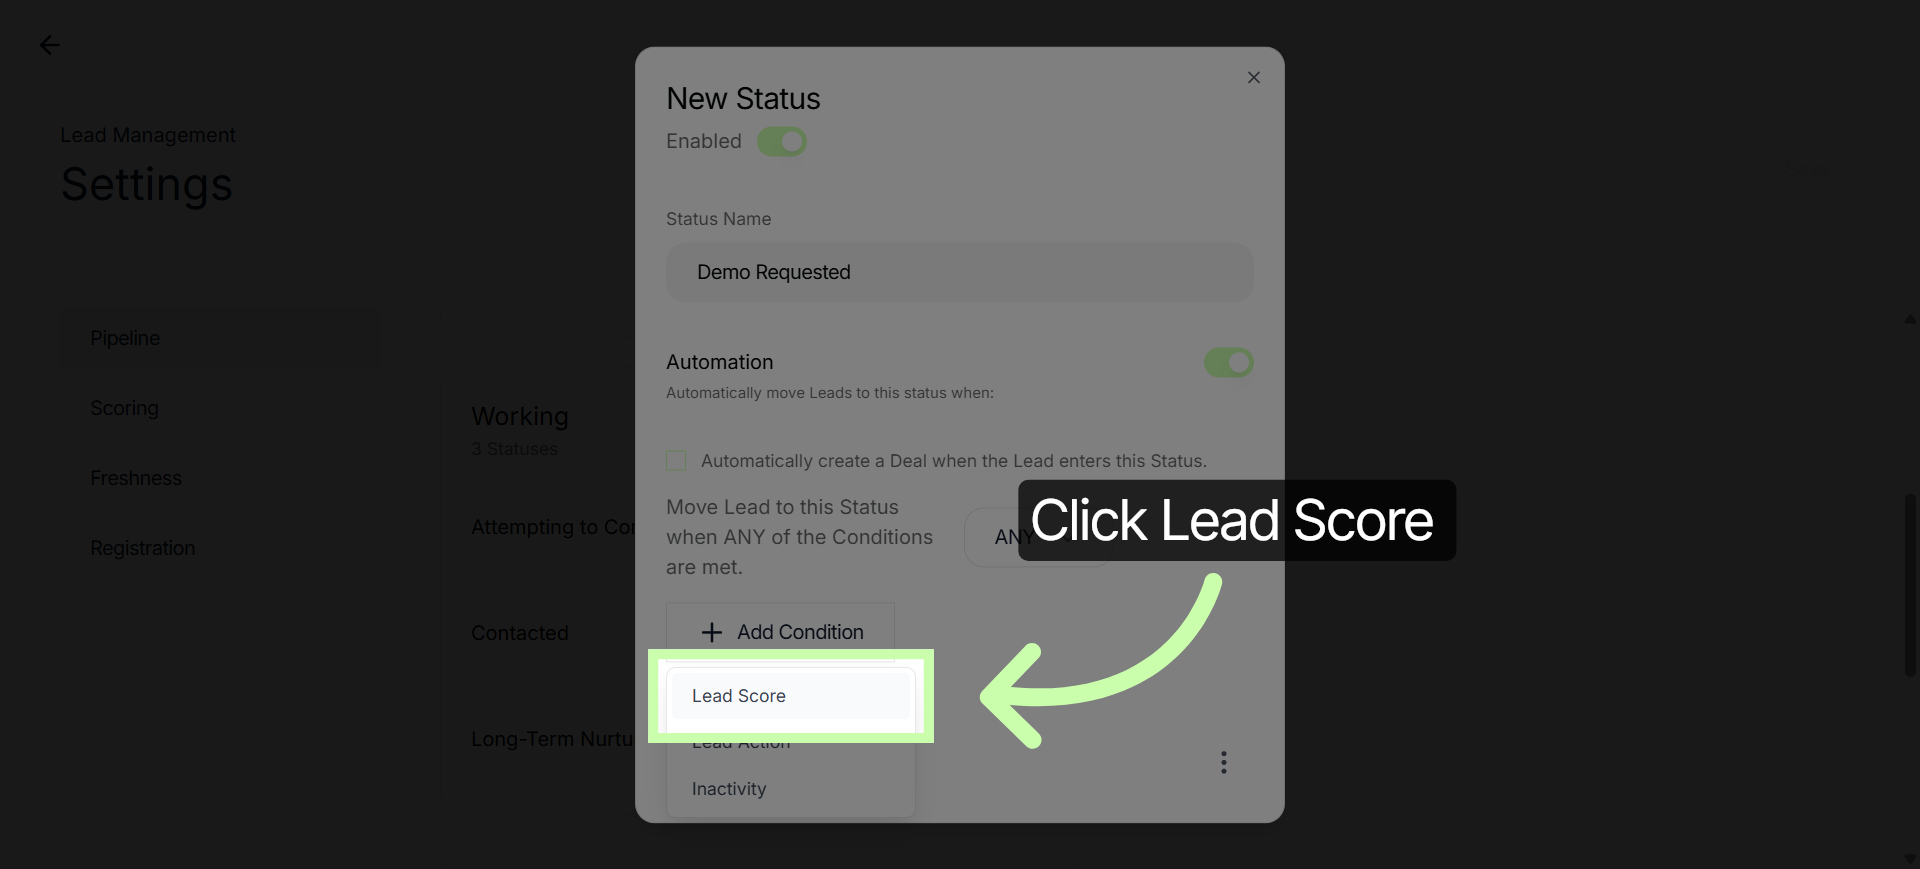
For example, click the Lead Score option to specify the lead score for status movement.
15. Select Score Value Field
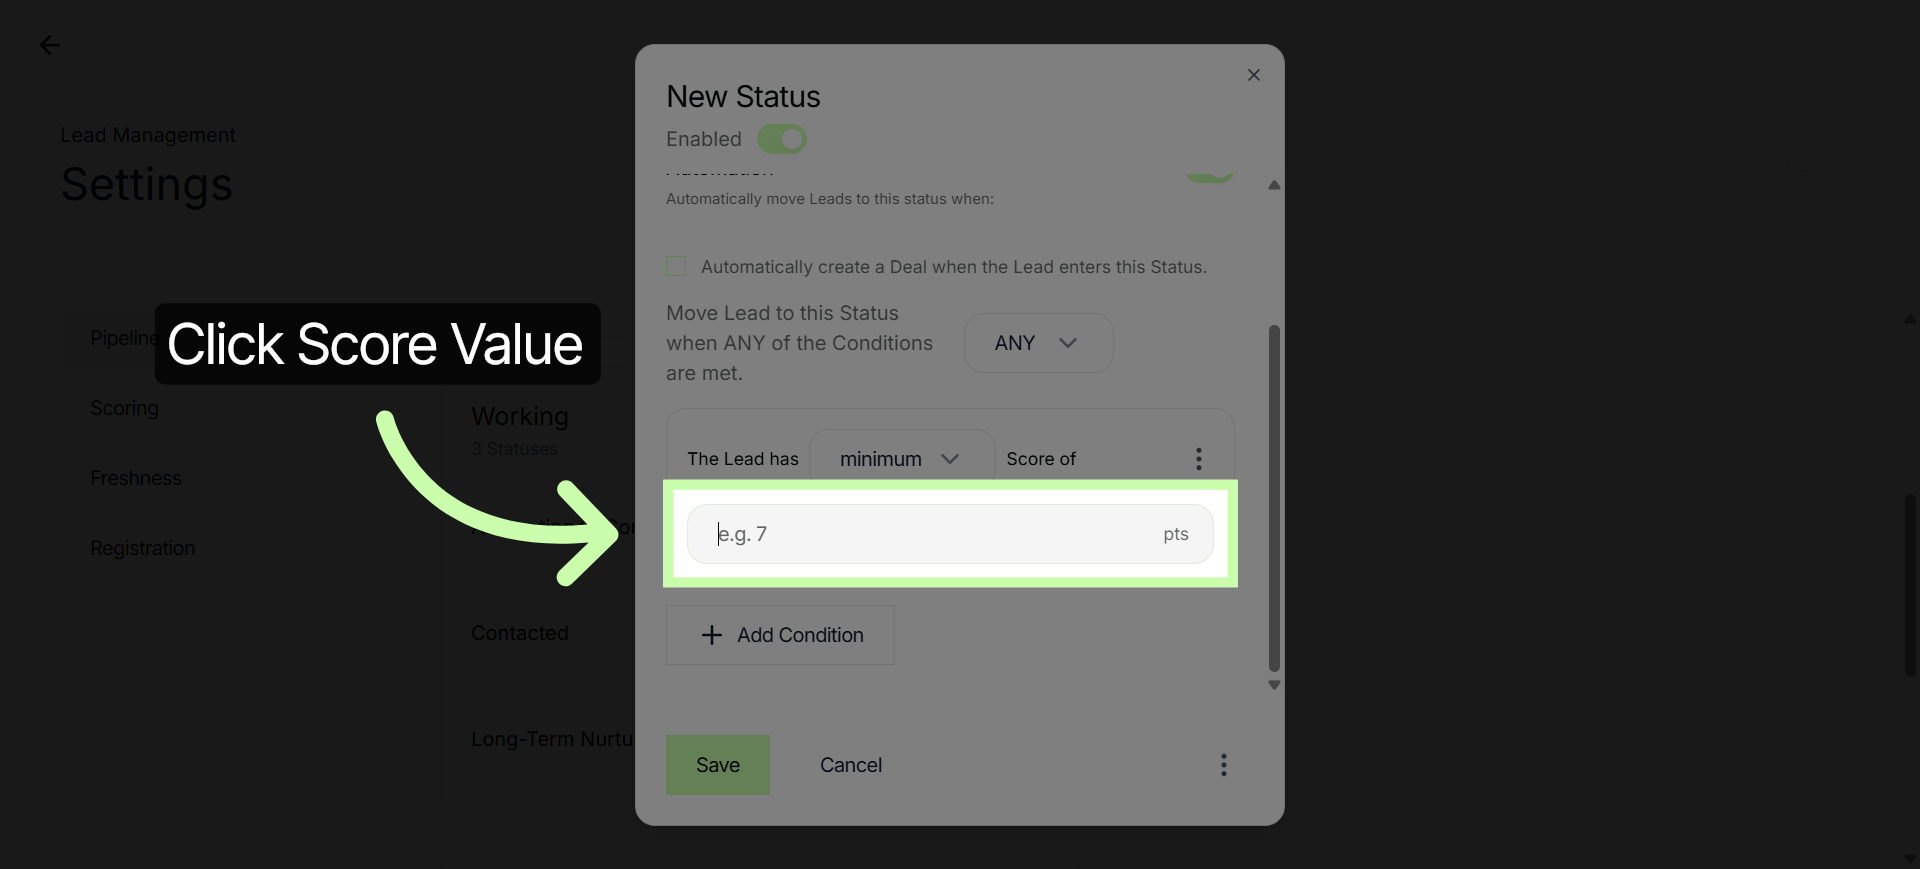
Click "Score value" to define the threshold score for the condition.
16. Set Score Value to 10
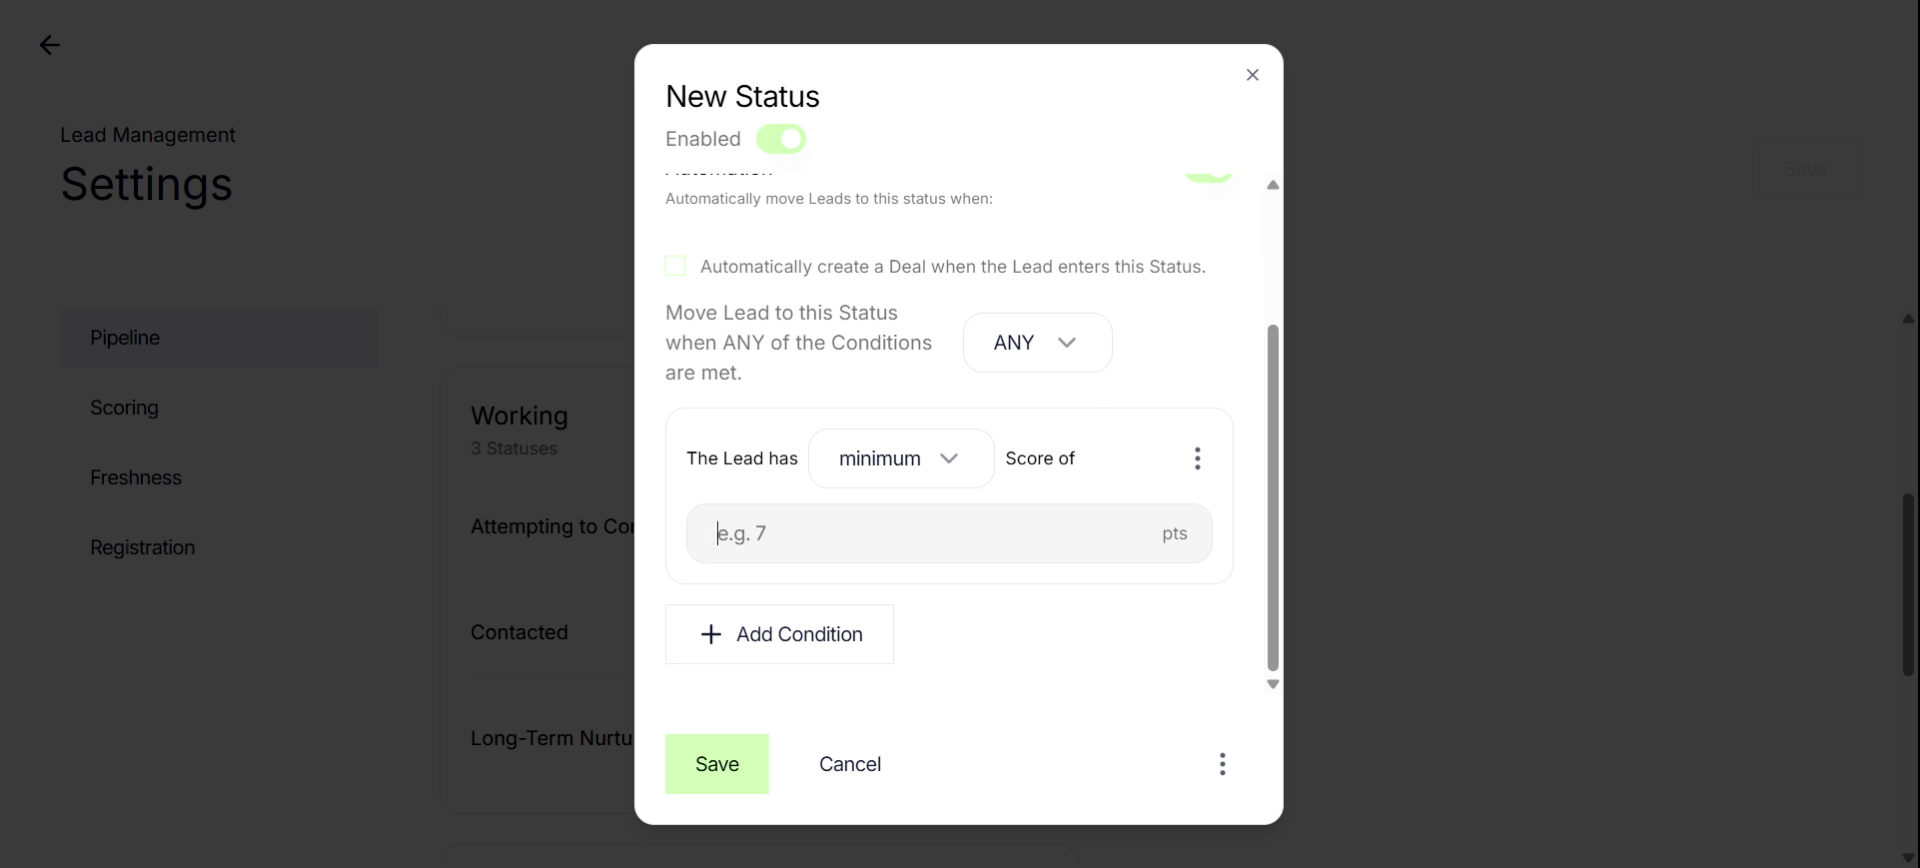
Here, I'll choose 10 as my threshold to move to the next status.
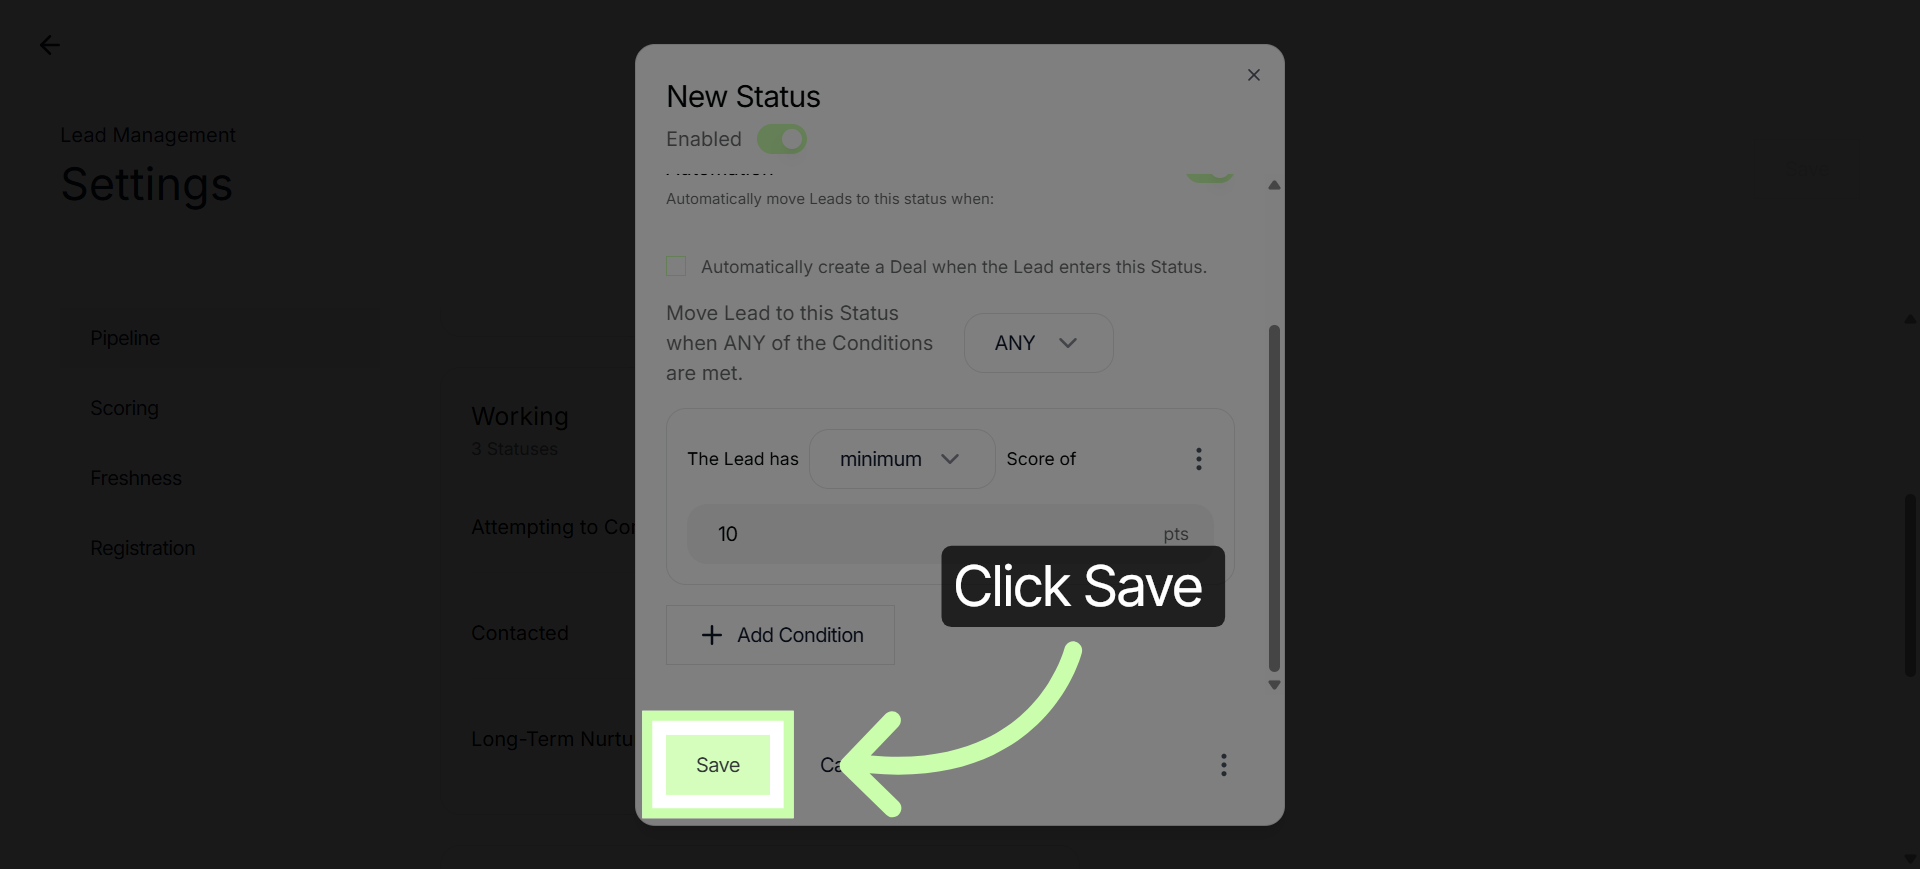
17. Save New Status
Click "Save". Your new status is automatically added to the default pipeline status.
Please continue to follow these steps for each and every stage involved in the process. It is important to repeat the outlined actions consistently throughout all stages to ensure uniformity and accuracy.